
前回は、カスタムフィールドというものを使って「デザインは変えずに要素だけを変更できるようする手順デザインは変えずに要素だけ変更できるようにする手順」を説明しました。
今回は、カスタムフィールドを再利用できるようにする手順を説明します。
今回やること
前回のように固定ページに使ったカスタムフィールドのグループには、1ページでカスタムフィールドの内容を管理することができるという良い部分があります。
一方で、今後カスタムフィールドを追加していく可能性がある場合は、固定ページに作るカスタムフィールドだと新しくカスタムフィールドを作るたびに「ラベル」や「名前」を何度も作る必要があり手間がかかってしまいます。
そこで、固定ページではない「ニュース」のような投稿ページを新しく1つ作ります。
その投稿にカスタムフィールドを使うことで、カスタムフィールドの「ラベル」や「名前」、「フィールドタイプ」などを書かずに同じカスタムフィールドを再利用することができるようになります。
最初から管理画面ある「投稿」や名前を変えただけの「ニュース」のような投稿ページに加えて、新しく作ることができる投稿ページのことをカスタム投稿タイプといいます
今回は、「設備の説明」という新しい「カスタム投稿タイプ」を作り、その投稿に前回作ったカスタムフィールドを利用していきます。
手順
functions.phpの編集
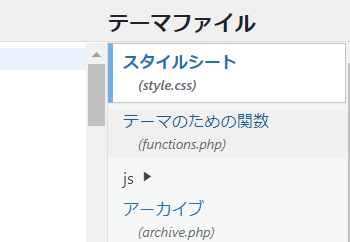
2. テーマファイルの中から「テーマのための関数(functions.php)」を選択します。
3. フォイルの内容に次のように書き加えます。
<?php

function post_has_archive( $args, $post_type ) {
	if ('post' == $post_type) {
		$args['rewrite'] = true;
		$args['has_archive'] = 'news';
		$args['label'] = 'ニュース';
	}
	return $args;
}
add_filter('register_post_type_args', 'post_has_archive', 10, 2);

//ここからがカスタム投稿タイプを設定する関数の定義
function cpt_register_equipment() { //add_actionの2つのパラメーターを定義
	$labels = [
		"singular_name" => "設備の説明",
		"edit_item" => "equipment",
	];
	$args = [
		"label" => "設備の説明",  //管理画面に追加される項目名
		"labels" => $labels,
		"description" => "",
		"public" => true,
		"show_in_rest" => true,
		"rest_base" => "",
		"rest_controller_class" => "WP_REST_Posts_Controller",
		"has_archive" => true,
		"delete_with_user" => false,
		"exclude_from_search" => false,
		"map_meta_cap" => true,
		"hierarchical" => true,
		"rewrite" => [ "slug" => "equipment", "with_front" => true ], //スラッグをequipmentに設定
		"query_var" => true,
		"menu_position" => 5,
		"supports" => [ "title", "editor", "thumbnail" ],
	];
	register_post_type( "equipment", $args );
}
add_action( 'init', 'cpt_register_equipment' );
色が濃くなっている13行目からのコードが今回書き足した部分です。
4. 「ファイルを更新」ボタンを押してください。
5. ページの再読み込みをしてください。
6. 「functions.php」の20行目に「設備の説明」と書いたことによって、管理画面に「設備の説明」という項目が追加されたことを確認してください。
5. もう一度「functions.php」を選択して、次のコードを書き加えます。
※この手順5と手順6、7は「設備の説明」の投稿にカテゴリーを付けたい人だけ行ってください。
おの<?php

function post_has_archive( $args, $post_type ) {
	if ('post' == $post_type) {
		$args['rewrite'] = true;
		$args['has_archive'] = 'news';
		$args['label'] = 'ニュース';
	}
	return $args;
}
add_filter('register_post_type_args', 'post_has_archive', 10, 2);

//ここからがカスタム投稿タイプを設定する関数の定義
function cpt_register_equipment() {
	$labels = [
		"singular_name" => "設備の説明",
		"edit_item" => "equipment",
	];
	$args = [
		"label" => "設備の説明",  //管理画面に追加される項目名
		"labels" => $labels,
		"description" => "",
		"public" => true,
		"show_in_rest" => true,
		"rest_base" => "",
		"rest_controller_class" => "WP_REST_Posts_Controller",
		"has_archive" => true,
		"delete_with_user" => false,
		"exclude_from_search" => false,
		"map_meta_cap" => true,
		"hierarchical" => true,
		"rewrite" => [ "slug" => "equipment", "with_front" => true ], //スラッグをequipmentに設定
		"query_var" => true,
		"menu_position" => 5,
		"supports" => [ "title", "editor", "thumbnail" ],
	];
	register_post_type( "equipment", $args );
}
add_action( 'init', 'cpt_register_equipment' );

//カスタム投稿タイプでカテゴリー別に投稿できるようにするための関数
function cpt_register_dep() { //add_actionの2つのパラメーターを定義
	$labels = [
		"singular_name" => "dep",
	];
	$args = [
		"label" => "カテゴリー",
		"labels" => $labels,
		"publicly_queryable" => true,
		"hierarchical" => true,
		"show_in_menu" => true,
		"query_var" => true,
		"rewrite" => [ 'slug' => 'dep', 'with_front' => true, ], //各カテゴリーのスラッグ
		"show_admin_column" => false,
		"show_in_rest" => true,
		"rest_base" => "dep",
		"rest_controller_class" => "WP_REST_Terms_Controller",
		"show_in_quick_edit" => false,
		];
	register_taxonomy( "dep", [ "equipment" ], $args ); //「equipment」というカスタム投稿タイプにカテゴリーを追加
}
add_action( 'init', 'cpt_register_dep' );
6. 「ファイルを更新」ボタンを押して、ページを再読み込みします。
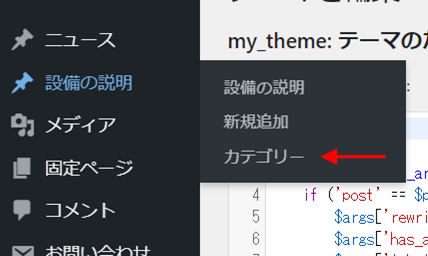
7. 管理画面の「設備の説明」に「カテゴリー」が追加されていることを確認してください。
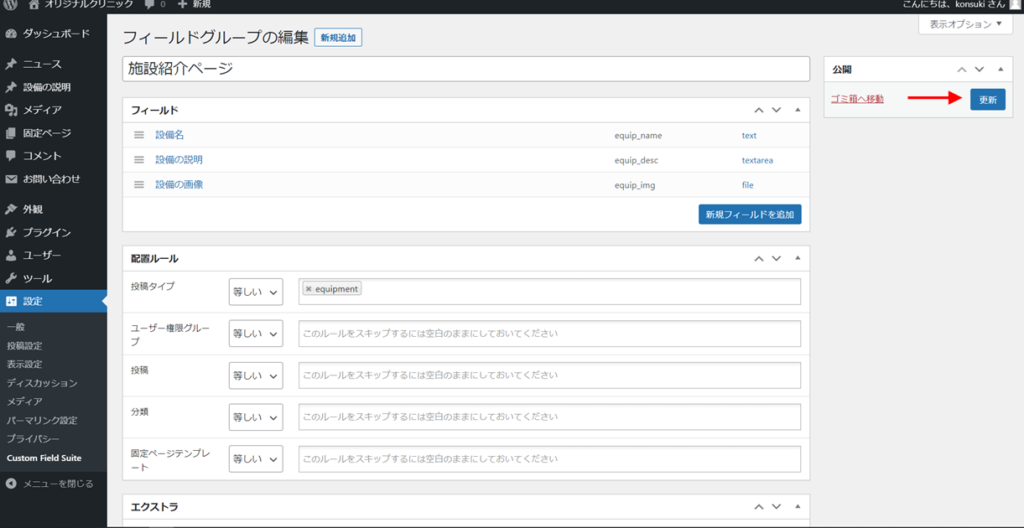
カスタムフィールドの編集
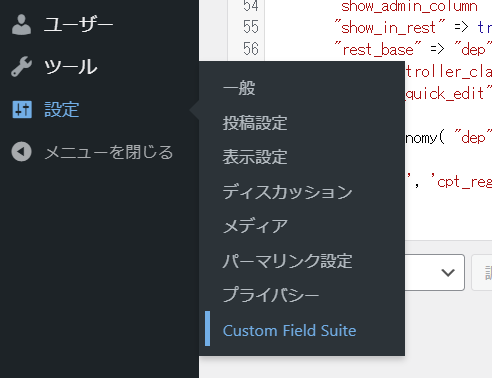
1. 管理画面から「設定 > Custom Field Suite」のように選択してください。
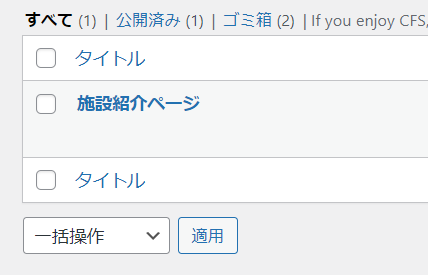
2. 表示されたフィールドグループの中から「施設紹介ページ」を選択します。
3. 「フィールド」の欄にある「フィールドを追加」ボタンをクリックしてください。
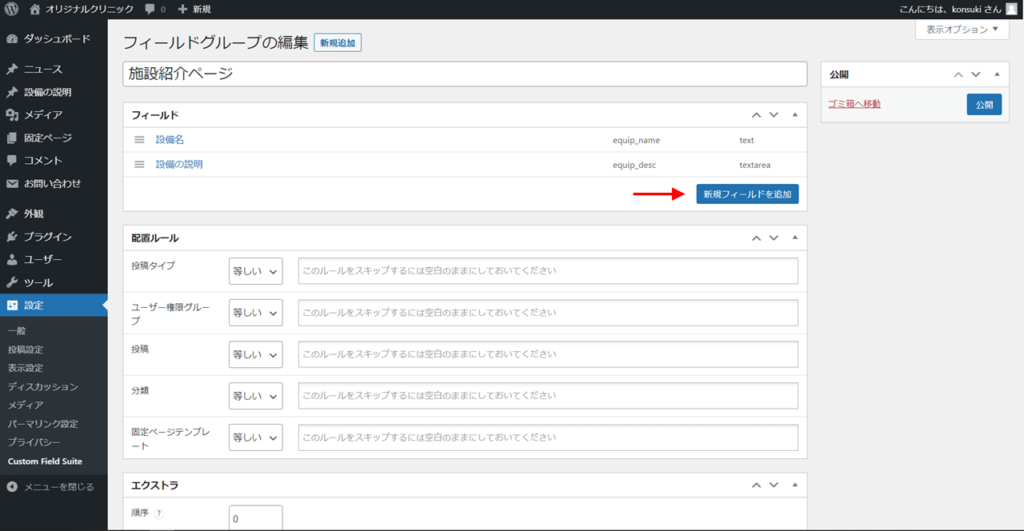
4. 追加されたフィールドを次のように設定します。
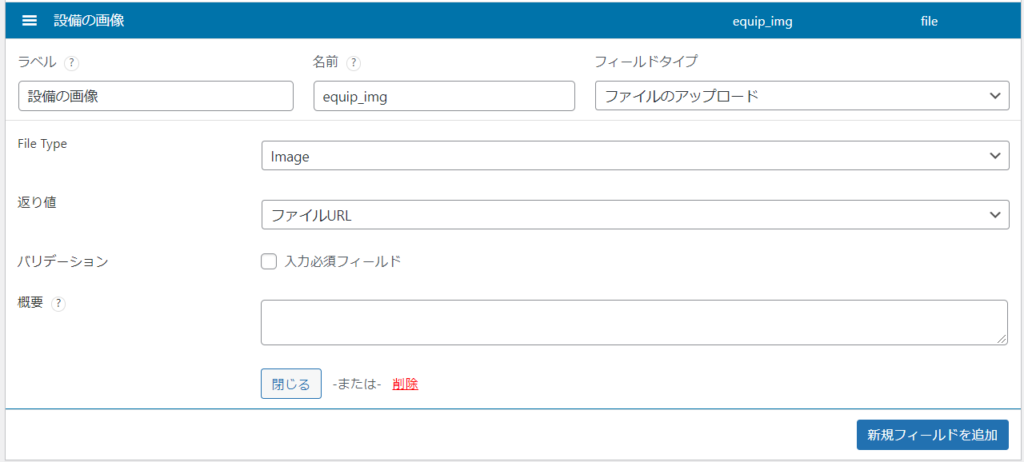
このカスタムフィールドは、WordPressの管理画面からサイト上の画像を変更するために追加しています。
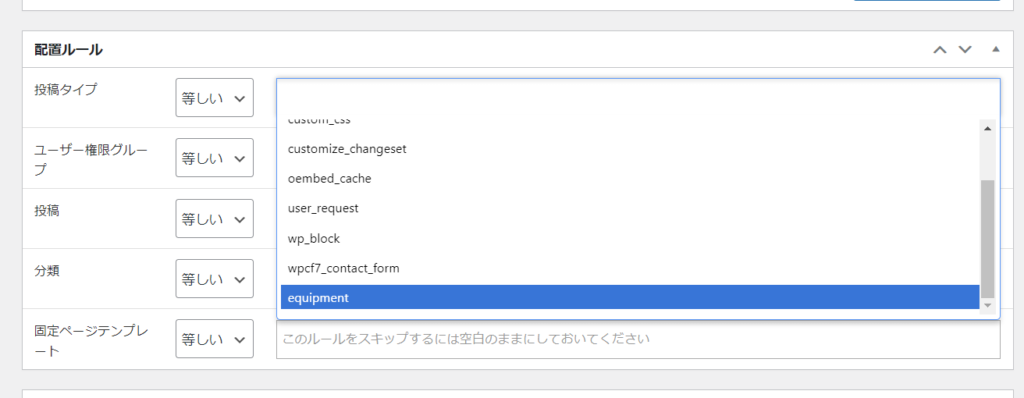
5. 設置ルールの欄にある投稿タイプ から「equipmen」を選びます。
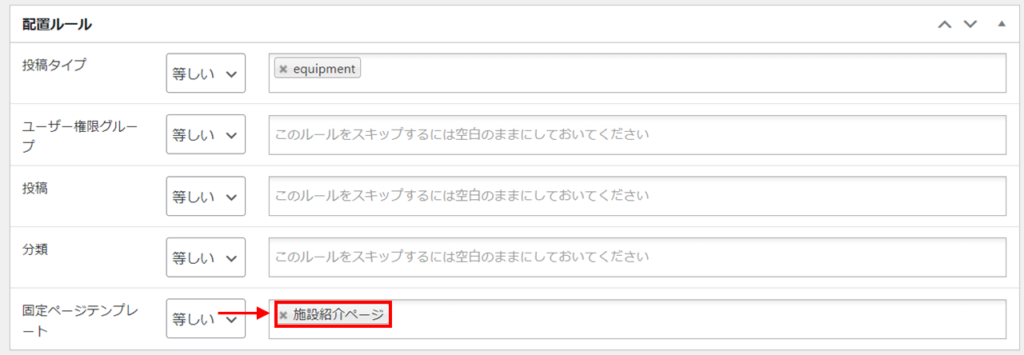
下画像の「固定ページテンプレート」の部分を見てください。
今回の場合は、前回選択した「施設紹介ページ」をそのままに設定していても影響がないと思います。
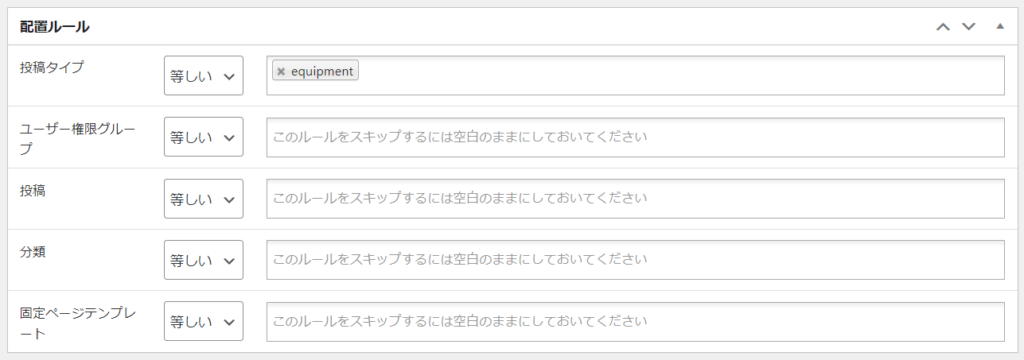
しかし、カスタムフィールドを使いたいページがもしも「施設紹介ページ」でなかった場合、カスタムフィールドは配置できるページが制限されて使えなくなってしまうため、念の為空欄にしておくといいかもしれません。

6. 右上にある更新ボタンを押します。
カスタムフィールドの中身の設定
テキストやテキストエリア、画像というような、カスタムフィールドを使って設定できるものの種類を編集し終わりました。
今度はカスタムフィールドにどんな文字や文章、画像などを入れていくかを決めていきます。
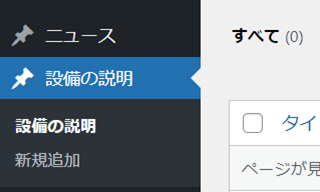
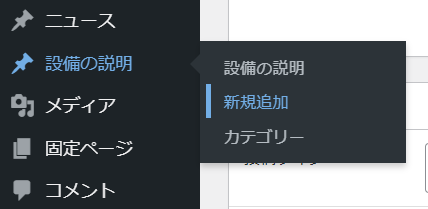
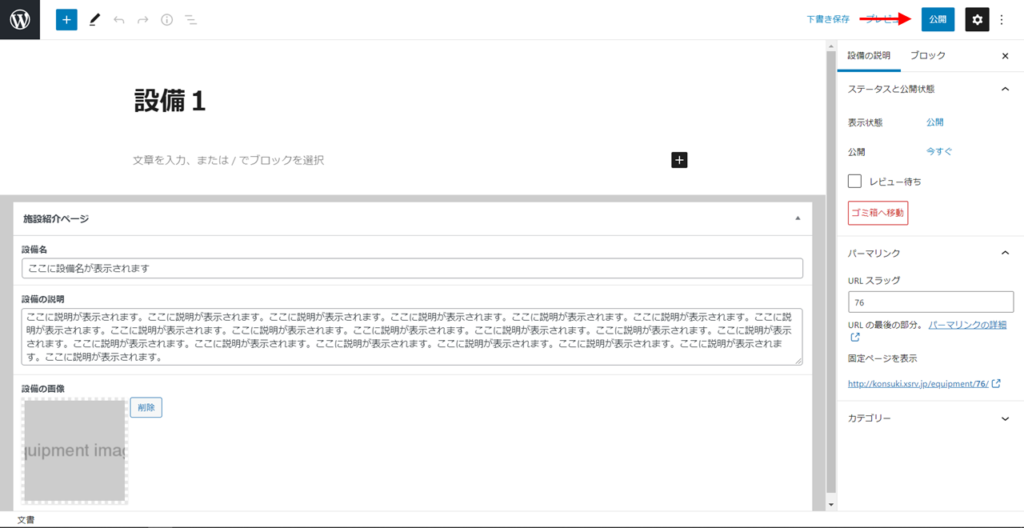
1. 管理画面から「設備の説明 > 新規追加」を選択します。
2. タイトルを次のように設定します。
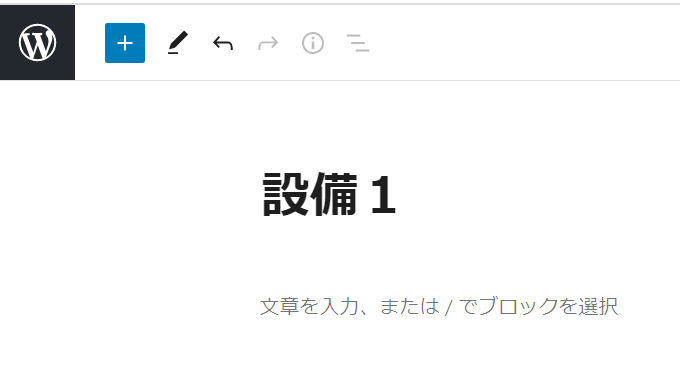
カスタム投稿タイプでの投稿は同じカスタムフィールドを繰り返し使うことが多いと思うためタイトルには数字やアルファベットなどの「ID」のようなものがあると後で編集する際に見分けが付きやすいかもしれません。
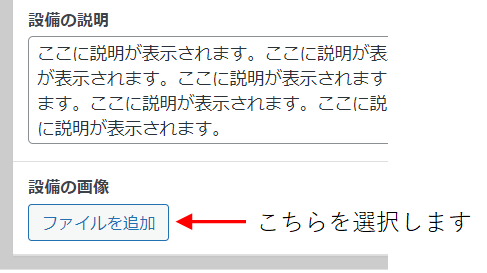
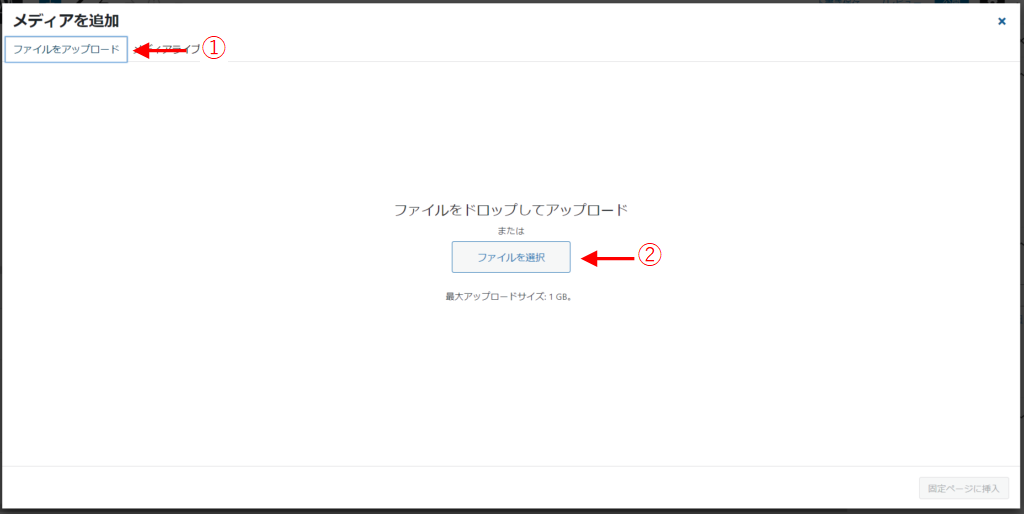
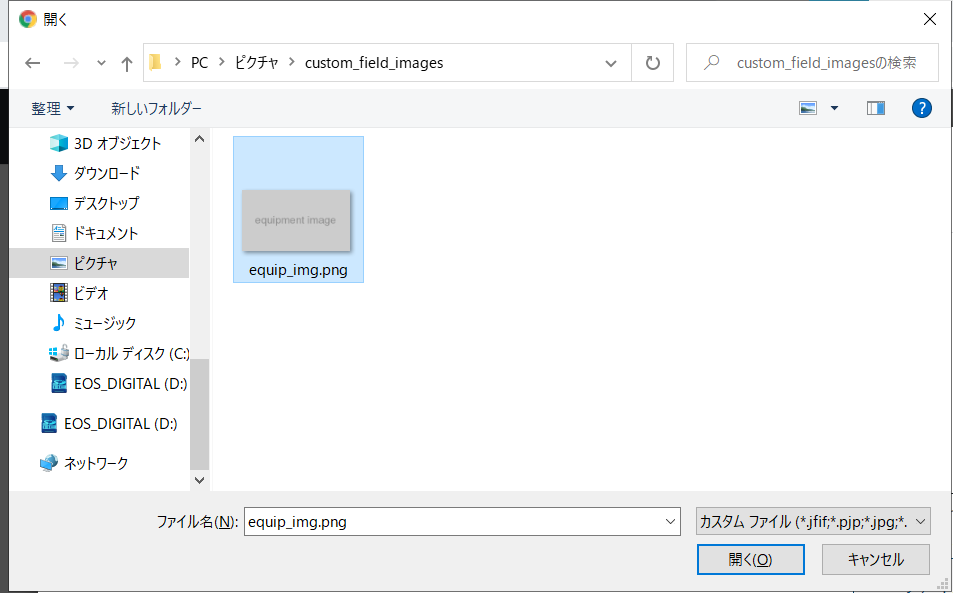
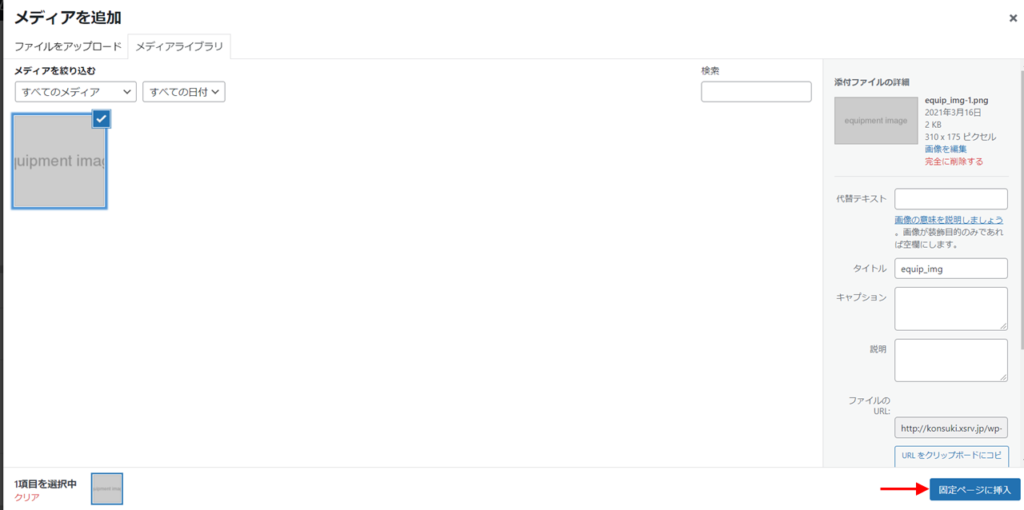
2. 「設備の画像」「設備名」「設備の説明」のカスタムフィールドの中身をそれぞれ入力します。
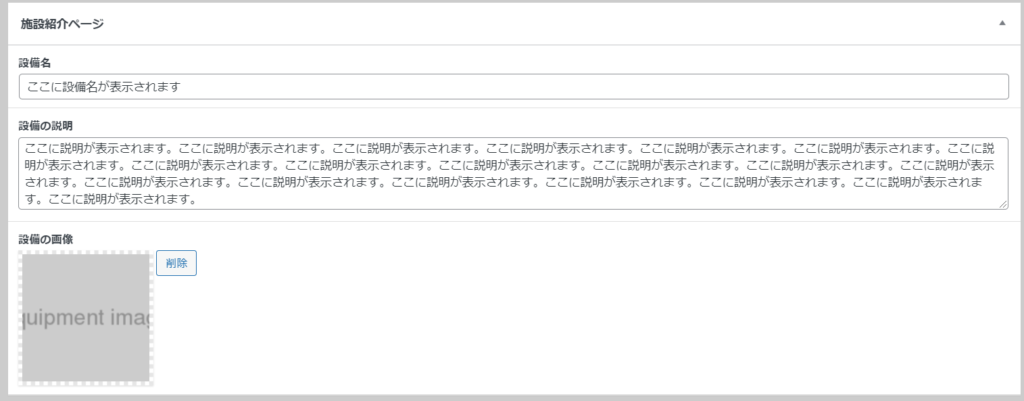
画像はパソコンにある画像をアップロードすることができます。
3. 右上にある公開ボタンを押します。
少し大変ですが、同じようにして6つほど投稿を公開しておくと後でサイトに表示したときに、画面の余白がなくないます。

投稿した内容を表示させる
最後に投稿した内容を「page-facility.php」の中で使う必要があります。
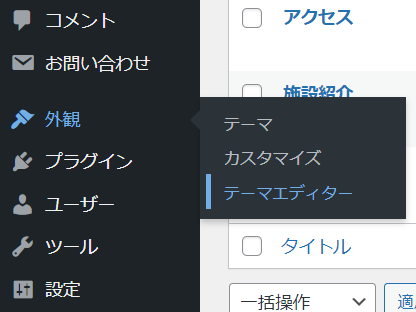
1. WordPressの管理画面から、「外観 > テーマエディター」のように選択します。
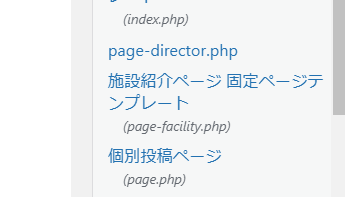
2. テーマファイルの中から「施設紹介ページ 固定ページテンプレート(page-facility.php)」を選びます。
3. ファイルの中身を次のように書き換えます。
<?php get_header(); ?>
<?php
/*
 Template Name: 施設紹介ページ
 */
?>
<div id="content" class="page_wrap page_inner">
	<div id="main">
		<h1><?php the_title(); ?></h1>
		<div id="equipment">
			<?php
			$args = array(
				'post_type' => 'equipment', // カスタム投稿タイプのスラッグ
				'posts_per_page' => 6  //1ページに表示する最大の投稿の個数
			);
			$the_query = new WP_Query($args); // 必要な情報を$argsという配列で渡しています
			?>
			<ul class="equip_list">
				<?php if($the_query->have_posts()): while ($the_query->have_posts()): $the_query->the_post(); ?>
				<li>
					<a href="<?php the_permalink(); ?>">
						<div class="equip_img"><img src="<?php echo CFS()->get('equip_img'); ?>" width="256px" height="144px"></div>
						<div class="equip_name"><?php echo CFS()->get('equip_name'); ?></div>
					</a>
				</li>
				<?php endwhile; ?>
			</ul>
			<?php wp_reset_postdata(); ?>
			<?php else: ?>
			<?php endif; ?>
		</div>
	</div>
	<?php get_sidebar(); ?>
</div>
<?php get_footer(); ?>
10行目から始まっている<div>要素の中身が変更されています。
よく見るとニュースや固定ページを表示するために書いてきた次のようなコードがなくなっています。
<?php if (have_posts()) : while (have_posts()) : the_post(); ?>このコードでは、カスタム投稿タイプの投稿の情報を取得することができないためです。
その代わりに、似ているコードが19行目にあります。
<?php if($the_query->have_posts()): while ($the_query->have_posts()): $the_query->the_post(); ?>11行目から17行目に書かれているコードは、上のコードによるループの中で使う情報を取り出すために書かれています。
前回も出てきましたが、カスタムフィールドの中身の情報を取り出してくるためには22行目と23行目のようなコードを書きます。
<div class="equip_img"><img src="<?php echo CFS()->get('equip_img'); ?>" width="256px" height="144px"></div>
<div class="equip_name"><?php echo CFS()->get('equip_name'); ?></div>
特に「?php echo CFS() -> get(); ?」の部分がカスタム投稿タイプの情報になっています。
この部分の基本的な書き方は次のようなります。
「?php echo CFS() -> get('カスタムフィールドにつけた名前'); ?」ここまでが完了すると、カスタム投稿タイプの投稿でカスタムフィールドを使うことができていると思います。
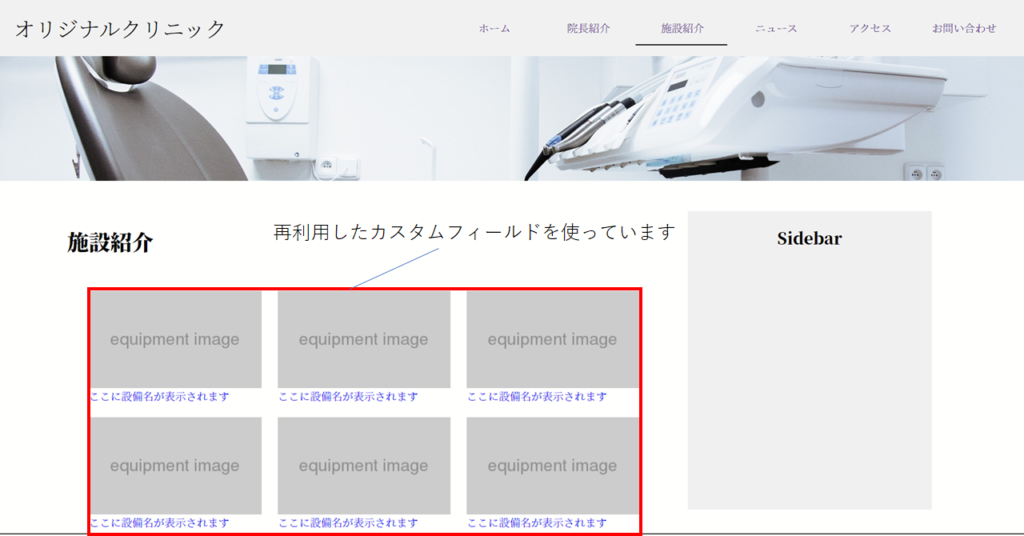
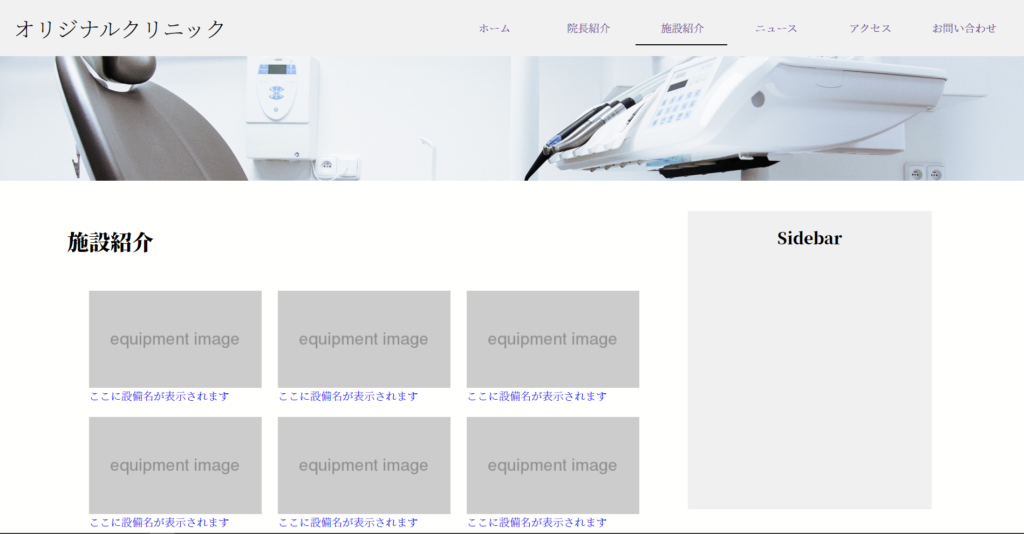
サイトの確認
CSSで少し見た目を整えると施設紹介ページには次のように表示されます。


コメント